
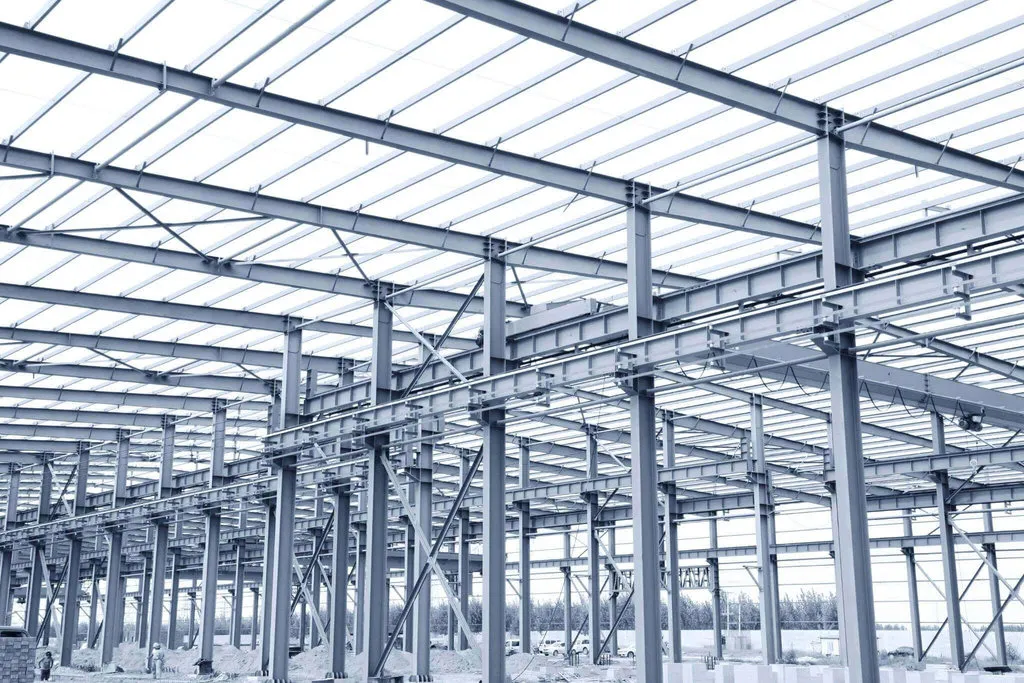
Purlins are the secondary steel members that span between the rafters of a steel building and carry the roof sheeting. On the walls the same members are called girts (or side rails), and they span between the columns to carry the wall cladding. In a typical warehouse, factory or PEB building, purlins and girts are a large share of the steel tonnage, so the way they are laid out, lapped and braced has a real effect on cost, deflection and how easy the building is to erect.
What purlins do
Purlins are not only sheeting supports. In a well-designed building they do four jobs:
- Carry the roof loads. Sheeting, insulation, services, maintenance loads, solar panels where they are added, and wind uplift. In the Gulf, wind uplift often governs the purlin design rather than gravity.
- Restrain the rafters. Purlins hold the rafter’s top flange in place, and with flange (fly) braces to the bottom flange they stop the rafter from buckling sideways.
- Act as struts in the bracing system. In the braced bays, the purlins at the bracing nodes carry axial force from the roof bracing to the eaves. These strut purlins have to be checked for compression, and are often heavier than the rest.
- Tie the frames together. The eave strut, the first member at the eaves, links the frames along the building and often supports the gutter.
Girts do the same on the walls: they carry wind pressure and suction from the cladding into the columns, and they restrain the columns’ outer flange.
Purlin shapes: Z, C and hot-rolled
Z (zed) purlins have one flange slightly wider than the other, so two Z sections of the same size can nest inside each other. That is what makes lapped, continuous purlins possible. Z sections are the standard choice for long runs of roof purlins in PEB and warehouse buildings.
C (channel or cee) purlins cannot nest, so they are normally used as simple spans, butted at the rafter. They are common at the eaves, around openings, at the ends of a run, as girts at door and window jambs, and in short or irregular bays.
Hot-rolled sections (channels, IPE or similar) are used where loads or spans are beyond cold-formed sections: heavy roof plant, long bays, purlins that also carry hoists or pipework, or buildings where the specification calls for hot-rolled steel throughout.
Material: cold-formed steel (CFS)
Most purlins and girts are cold-formed steel: thin galvanised strip roll-formed into Z or C shapes. Typical sections are around 150 to 300 mm deep and 1.5 to 3 mm thick, with the thickness chosen bay by bay.
Common material grades:
- EN 10346 S350GD or S450GD with a Z275 zinc coating (275 g/m², both sides), the usual European specification.
- ASTM A653 Structural Steel Grade 50 (345 MPa) or Grade 55 (380 MPa), galvanised, common in PEB systems.
- ASTM A1011 hot-rolled strip, painted rather than galvanised, used by some PEB suppliers.
- S275 or S355 for hot-rolled purlins.
Because the steel is thin, cold-formed sections are designed with effective (reduced) section properties: the flanges and web can buckle locally before the steel yields. That is why cold-formed purlins are designed to their own codes, AISI S100 or EN 1993-1-3 (BS 5950-5 on older projects), not with the rules for hot-rolled beams.
Lapped continuous vs simple-span purlins
This is the decision with the biggest effect on purlin weight. There are two ways to fix purlins at the rafters.
Simple span (butted, pin-ended)
Each purlin spans one bay and stops at the rafter, bolted to a cleat. Every bay works as a simply supported beam:
- Maximum moment = wL²/8 = 0.125 wL²
- Maximum deflection = 5wL⁴/384EI ≈ 0.0130 wL⁴/EI
It is simple to detail, fabricate and erect, any purlin can be replaced on its own, and it suits short or uneven bays, openings and C sections. The price is weight: the full mid-span moment and deflection have to be carried by the section alone.
Lapped (overlapped, continuous)
Z purlins are run past the rafter and overlapped with the next length, bolted together through the webs. Over the rafter the section is doubled, and along the run the purlins behave as a continuous beam:
- In the internal bays of a long run, the support moment drops to about wL²/12 ≈ 0.083 wL², and mid-span deflection to about wL⁴/384EI, roughly one fifth of the simple-span value.
- In the end bays, the moment at the first internal rafter is about wL²/10, and the deflection is around half the simple-span value (≈ 0.0069 wL⁴/EI for three equal spans).
Compared with simple spans, internal bays need about a third less bending capacity and a fraction of the stiffness. The highest moment sits over the rafter, exactly where the lap doubles the section. The result is a lighter purlin, usually a thinner gauge, for the same bays and loads.
Practical points that come with laps:
- End bays are the critical bays. The end span and the first internal support carry the highest moments, so end bays often get a thicker purlin or a longer lap.
- Lap length comes from the purlin system’s tables or the design, not from site habit. Laps must be centred on the rafter.
- The lap zone needs a combined check of bending and shear, and web crippling at the support.
- Continuity needs regular bays. Large changes in bay length, expansion joints or openings break the run, and simple spans are used there.
Lapped Z purlins are the standard choice for long, regular warehouse roofs; simple-span purlins remain the right answer for short runs, irregular grids and wherever replacement or simplicity matters more than the last few kilograms.
Sag rods and bridging
Sag rods are small round bars, or light angles used as bridging, that run between the purlins across the roof slope, usually at mid-span or third points of each bay. They do three things:
- Reduce the weak-axis span. On a sloped roof, part of the load acts along the slope, bending the purlin about its weak axis. Sag rods cut that span.
- Restrain the purlins under uplift. Under wind suction the bottom flange is in compression and is not held by the sheeting, so the purlin can twist and buckle laterally. Sag rods and bridging provide restraint points.
- Keep the purlins straight during erection, before the sheeting goes on. Many purlin problems on site start with sag rods fitted late or not tightened.
Sag rods must be anchored at the ridge, tied across to the purlins on the other slope, and at the eaves, so the forces have somewhere to go. Common practice is one line of sag rods for shorter bays and two lines at the third points for longer bays, with the actual number set by the design.
On the walls, sag rods in the girts carry the self-weight of the cladding and keep the girts level.
Purlin spacing
Purlin spacing is set by what the roof sheeting can span under the design loads, taken from the sheeting manufacturer’s tables, and by the purlin capacity. For metal roofs it is commonly around 1.2 to 2.0 m, closer near the eaves, ridge and corners where wind suction is highest. Sandwich panels usually span further than single-skin sheets.
Spacing and purlin size are a trade-off: more purlins at closer spacing with a lighter sheet, or fewer, heavier purlins with a stronger sheet. The cheapest roof comes from checking both together, not from fixing the spacing first.
Girts: the wall purlins
Girts follow the same principles with a few differences:
- Wind governs. Girts are designed for wind pressure and suction, with the cladding’s self-weight carried by sag rods.
- By-framed or flush. By-framed girts sit outside the columns and can be lapped like roof purlins. Flush (inset) girts sit between the columns, are simple spans, and save wall thickness.
- Openings need framing. Doors, louvres and windows interrupt the girts, so jamb and header members are added to collect the girts and carry the wind into the frame.
- Base angle. At ground level a base angle or channel fixes the bottom of the cladding to the slab.
Design checks for purlins and girts
- Bending with effective section properties, including local and distortional buckling
- Shear, and combined bending and shear at the laps and supports
- Web crippling at the rafter
- Lateral-torsional buckling under uplift, with the restraint the sheeting and sag rods really provide
- Deflection, to the limit in the project specification (commonly span/150 to span/200 depending on the code and roof type)
- Axial compression for strut purlins in the braced bays
- Bolts and cleats, including bearing on thin steel
- Extra loads such as solar panels, roof walkways, plant and hung services
Common mistakes on site and in design
- Designing all bays with one section, instead of upgrading the end bays and lightening the internal bays.
- Sag rods missing, loose or not anchored at the ridge and eaves.
- Laps off-centre on the rafter, or shorter than designed.
- Holes cut through flanges on site for services.
- Strut purlins in the braced bays not checked for axial load.
- Solar panels or plant added to an existing roof without checking the purlins.
Purlins in Wrenze projects
Purlins, girts and sag rods are part of every warehouse and industrial building we design. On projects such as the DIC warehouses in Dubai Industrial City and the 25,000 m² FOODTEC factory, the purlin layout, lap positions and sag rod lines are fixed together with the frames and bracing, then set out in the shop drawings so the roof goes up as designed.
Purlin questions
What is the difference between purlins and girts?
Both are secondary members. Purlins span between rafters and carry the roof sheeting; girts span between columns and carry the wall cladding.
Why are Z purlins used for long roofs?
Z sections can nest inside each other, so they can be lapped over the rafters to work as a continuous beam. That lowers the moments and deflections, and allows a lighter section.
What do sag rods do in purlins?
They reduce the weak-axis span on a sloped roof, restrain the purlins against twisting under wind uplift, and keep them straight during erection.
Are purlins hot-rolled or cold-formed?
Most are cold-formed galvanised steel. Hot-rolled sections are used for heavy loads, long bays or where the specification requires them.
Related
Warehouse and PEB design · Shop drawings and detailing · Structural steel design · Bracing in steel structures
For purlin and roof design on your project, contact our engineers.